Food Service Repair: Tool Chest Buying Guide
By Priya Desai • 19th Feb
When a restaurant's walk-in cooler fails at dinner service, every minute of downtime costs money. The technician who walks in already knows exactly where their refrigerant lines are, which wrenches fit the job, and where the sealant tape lives. Speed matters. But speed only comes from a system, and systems start with food service repair tool storage that behaves the same way every time. This guide walks you through choosing and setting up commercial kitchen tool organization that turns heroic firefighting into predictable, repeatable wins.
Why Tool Chest Standards Matter More in Food Service Than You Think
Food service repair is different. You're not working in a static garage where you clock in to the same bay every day. You're mobile, called to different kitchens, sometimes working in tight spaces under tight timelines. Your tools travel. Your storage needs to be both portable and standardized (the same chest layout whether it's hanging in your van or sitting in a central prep area). Consistency outperforms heroics on any busy Monday, and food service repair runs on Mondays.
Standardized best tool chest organization cuts the average 2-3 minute tool-hunt per job. For step-by-step layouts that reduce search time, see our tool chest organization guide. For a technician handling 8-12 calls per day, that's 16-36 minutes reclaimed. Over a month, that's half a workday of throughput gain without hiring.
What Search Results Tell Us About Tool Chest Fundamentals
Before choosing a specific chest for food service repair, you need to understand the categories and features that matter. Tool chests come in two main archetypes: top-lid chests (single-unit boxes with hinged tops, ideal for portability and simplicity) and drawer cabinets with multiple gliding drawers, which scale for larger teams and mixed tool sets.
Modern commercial setups often combine these. A base cabinet with 20 drawers sits stationary; a roll-cart or portable top chest sits on top or moves between service calls. This hybrid approach lets you standardize the base layout across all technicians while keeping mobile tools synchronized.
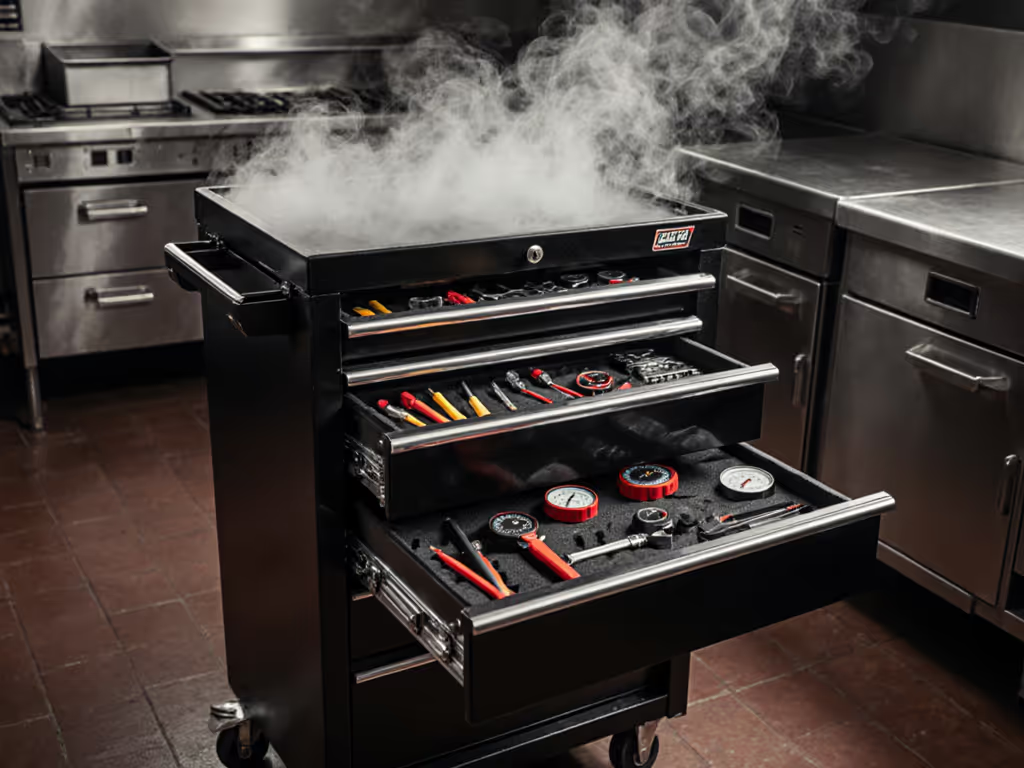
Key material and construction features to evaluate: durable steel construction (not hollow particleboard), full-extension or heavy-duty slides rated for 300-600 lbs depending on slide type, casters that roll smoothly on gritty shop and kitchen floors, and sealing or gaskets that resist dust and grease penetration. Food service environments are damp, oily, and corrosive: your chest will face frying oil vapor, cleaning chemicals, and occasional water splashes. If humidity is a constant, use our climate-controlled storage guide to prevent moisture damage and corrosion.
1. Assess Your Workflow: Portable vs. Stationary
Your first decision is motion. Are you primarily a mobile technician working across multiple customer kitchens, or are you anchored to a service center with occasional field calls?
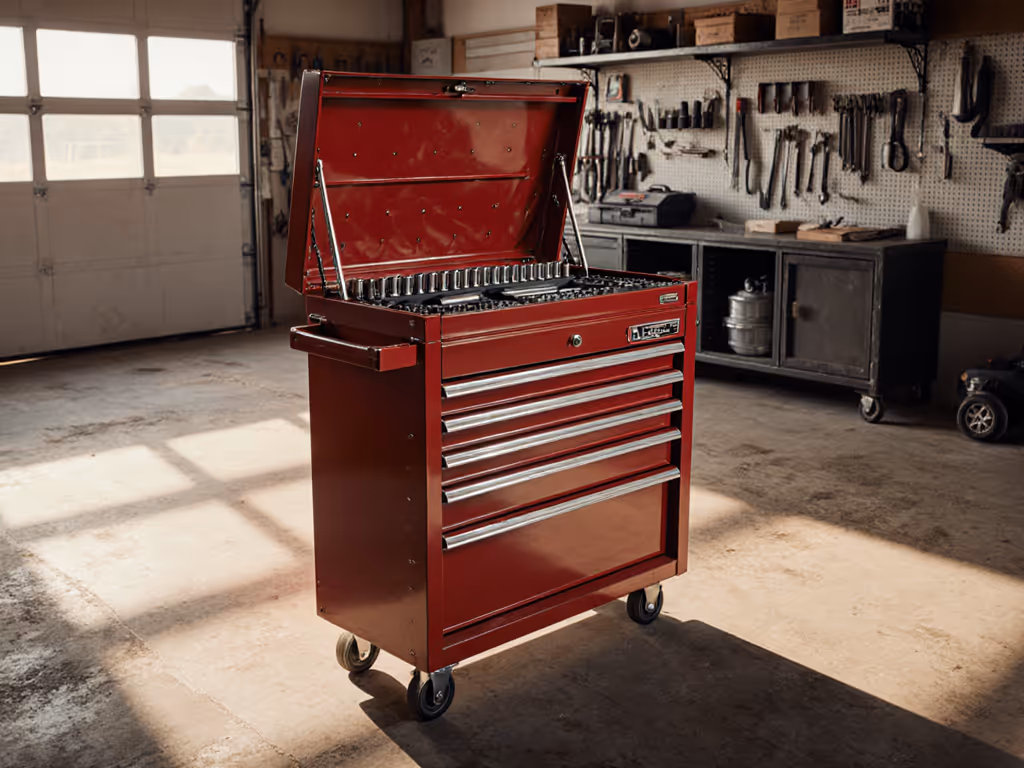
Mobile-First Workflow: If you're constantly in different kitchens, you need a portable tool chest (something that fits in a van or moves easily through a kitchen without snagging door frames). A compact top chest (roughly 27-36 inches wide) with quality casters or a carrying handle works here. You want the absolute highest-frequency tools inside: key wrenches, diagnostic multimeter, common replacement parts, and quick-reset documentation. Everything else is "brought on special order."
Service-Center Workflow: If you work from a central hub and dispatch to sites, you can afford larger base cabinets with more drawer capacity. Think a 55-72 inch roller cabinet as your primary "mother ship" stocked for the week, plus a smaller portable chest as a take-along for routine calls. This is where restaurant equipment repair storage scales best: each type of repair (HVAC, walk-in, fryer, dishwashing line) gets its own labeled drawer set, and technicians grab the prepped mobile chest before heading out.
2. Define Drawer Zones and Map Them First (Before Buying)
Do not buy a chest and then figure out what goes where. Document it, then do it. This is the 5S principle that separates consistent shops from chaotic ones.
For food-safe tool organization, you need to think about contamination risk. Refrigerant lines, electrical components, and mechanical fasteners should never sit next to food-contact surfaces or refrigerant canisters. Create zones:
- Zone A (Top Drawers): Diagnostic tools, meters, thermometers, notepads, checklists. Highest frequency, fastest access, kept cleanest.
- Zone B (Middle Drawers): Common fasteners, wrenches, pliers, screwdrivers sorted by size. Medium frequency, medium-depth retrieval.
- Zone C (Lower Drawers): Specialty tools, large replacement parts, cleaning supplies, safety equipment, documentation. Lower frequency, some items may be food-service-specific (e.g., sanitizer-safe wiping cloths, chemical-resistant gloves).
- Zone D (Doors/Side Shelves): Reference charts, spare batteries, charging cables, contact info, audit checklists.
This zoning cuts search time drastically. Your eye and hand know exactly where to go; no drawer rummaging.
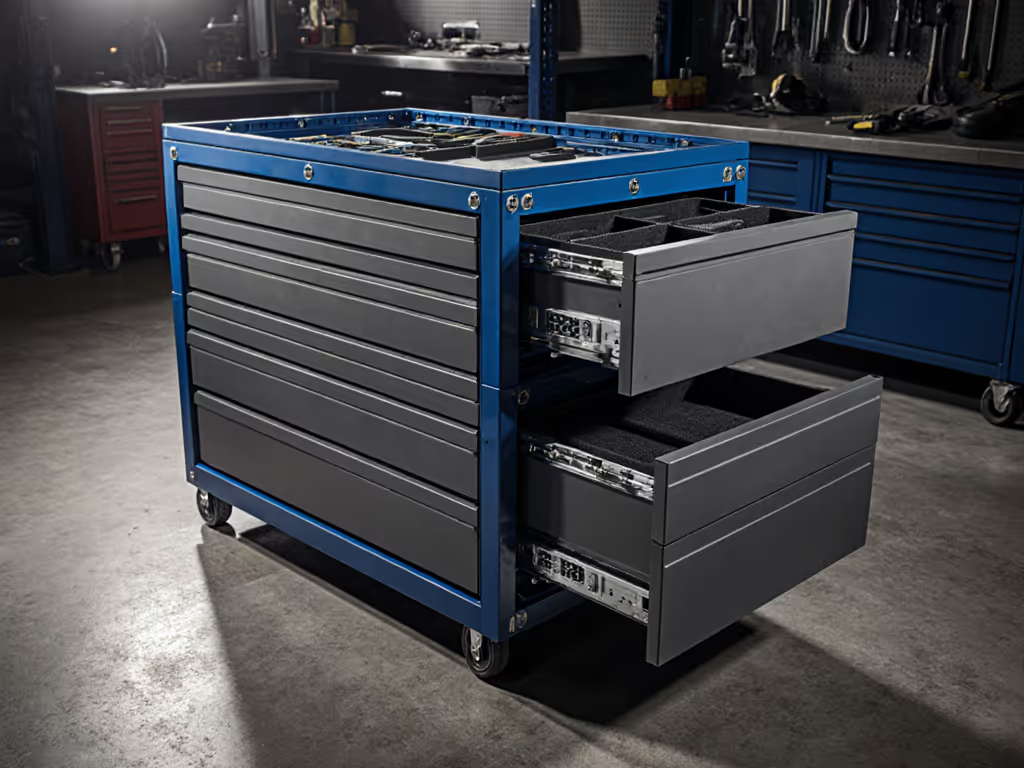
3. Evaluate Drawer Slides, Load Ratings, and Sealing
Drawer quality separates professional tool chests from hobby boxes—see our drawer slide comparison for ball bearing vs roller vs soft-close details. Search the market for chests explicitly rated for 300-600 lbs per slide. Full-extension slides (drawers that open fully) let you see every item without reaching to the back, reducing tool loss and retrieval time.
For commercial kitchen tool organization in a damp, greasy environment, sealing matters. Look for:
- Gasket-sealed drawers or partial sealing around drawer faces to keep frying oil vapor and moisture out.
- Stainless steel or powder-coated steel tops and fronts that resist corrosion and grease staining.
- Smooth-close or friction drawers that close quietly and don't slam (important in kitchens where noise and disruption are costly).
Test drawer action in person if possible. A $3,000 cabinet with creaky, racking drawers is a slow-motion nightmare. A $1,200 cabinet with buttery slides becomes an asset to your throughput.
4. Choose Casters Carefully - They Impact Every Job
Your chest rolls across wet tile, oily concrete, and debris-laden floors. Bad casters turn mobility into frustration. Evaluate:
- Size and material: 4-5 inch diameter, rubber or polyurethane wheels. Smaller casters catch on crud; larger ones roll over grime and transition thresholds more smoothly.
- Locking mechanism: Brakes on all casters or at least the rear pair. You don't want a loaded cabinet drifting when you're bent over working on a cooler.
- Load capacity: The cabinet itself weighs 200-600 lbs; add tools and you're easily at 800+ lbs. Verify total caster capacity is 2-3x the cabinet weight.
- Swivel vs. fixed: At least two fixed rear casters for straight-line tracking; the front pair can swivel for tight turns in kitchen corridors.
A $40 upgrade from basic wheels to heavy-duty mag or polyurethane casters often pays for itself in one month of less strain and faster setup.
5. Plan for Expandability and Modular Growth
You buy a base cabinet today; in 18 months you've added specialty tools for fryer repair, gained a second technician, or expanded to a second location. Buying an architecture that scales saves thousands later.
Look for systems that allow you to stack, side-by-side, or integrate a hutch (an overhead cabinet mounted on top). Some manufacturers offer compatible top chests and side lockers that bolt to the base unit without redoing the whole layout. This is the modularity that sustains a long-term standardization effort. Plan expansion up front with our modular storage roadmap so new components remain compatible.
For a food service repair tool storage setup serving multiple technicians, this is non-negotiable. Each tech needs the same baseline zones and tool positions; adding capacity without reshuffling existing drawers prevents retraining friction.
6. Integrate Visual Management and Labeling for Durability
A color-coded zone system and shadow foam are only useful if they survive your environment. In food service, aggressive cleaning happens daily: hot water, degreasers, bleach.
Labeling and Durability Tips:
- Use industrial-grade label makers (Brother or similar) with laminated adhesive labels rated for moisture and chemicals. Sticky notes and hand-written labels last hours.
- Color-code by function: Green for electrical tools, blue for refrigeration, red for safety equipment. Makes a quick visual scan possible even in poor lighting.
- Shadow foam or EVA inserts should be removable and replaceable. When your tool set changes (e.g., you retire a 7/16" wrench), you rework one foam piece, not the whole drawer.
- Laminated reference cards inside drawer lids: "Top Drawer Reset Sequence," "First-Call Checklist," contact numbers for complex equipment. Survives moisture because it's sealed.
Document it, then do it: Write the reset sequence (e.g., "5-minute close-out procedure: refill wrenches, check batteries, wipe spills, close and lock") before you finalize the layout. This becomes your training tool and audit standard.
7. Cordless Tool Charging and Battery Safety in Food Service
Modern technicians run on cordless power: impact driver, reciprocating saw, angle grinder, thermal camera. But cordless chaos (loose batteries, mixed chargers, overheating) creates downtime and fire risk.
Your chest should include:
- A dedicated charging drawer with pass-through power (outlet mounted in the cabinet wall or via power strip inside).
- Battery cooling: Batteries generate heat. Overcrowded charging in a sealed drawer can cause swelling or, in extreme cases, failure. A small USB fan or open-front charging basket keeps air moving.
- Cable routing: Velcro straps or cable trays along the back of the cabinet prevent cord tangling and drawer collision.
- Labeling by battery type: Different voltages and chemistries should not intermix. A simple label system ("DeWalt 20V," "Makita 18V") prevents grabbing the wrong charger.
For restaurant equipment repair storage, this is hygiene. A loose lithium-ion battery rolling onto a production line is a hazard. Organized, contained charging eliminates that risk. For prevention checklists and safe battery storage, read our tool chest fire safety guide.
8. Sanitary Setup and Food-Contact Protocols
Sanitary workshop setup in food service demands a separation mindset. Your tools will never touch raw food or food-contact surfaces, but cross-contamination is a regulatory and liability concern.
Best Practices:
- Separate tool zones: Keep refrigerant and diagnostic tools distinct from any cleaning supplies or solvents that might volatilize near food surfaces.
- Use tool-specific cleaning rags: Microfiber cloths for electronics, separate degreasers for greasy hardware, never shared between food and non-food areas.
- Document your setup in a photo-based checklist: A laminated card showing the correct closed chest ("Green tape across front = sealed and clean") gives you and health inspectors confidence.
- Audit trail: A simple dated log on the chest lid (e.g., "Last restocked 2/18, verified tools present") creates accountability and catches missing tools before they become a problem.
Restaurant Health & Safety codes increasingly ask for traceability. A photo-documented, labeled tool chest is your defense.
9. Total Cost of Ownership: Upfront vs. Lifetime
A best tool chest is not the cheapest one. Calculate total cost of ownership over 5 years:
- Base cabinet cost: $800-$2,500 depending on size and features.
- Drawers/inserts (foam, dividers, liners): $200-$500 initial setup; $50-$100 per year for replacements and updates.
- Labeling and documentation: $30-$100 one-time (label maker, laminated cards).
- Caster replacement (wear component): $80-$200 per set, likely once in 5 years on heavy-use cabinets.
- Maintenance and parts: $20-$50 per year (lubricating slides, tightening bolts, replacing a worn drawer front).
- Time to organize and train per technician: 2-4 hours initial setup, worth ~$200-$400 in labor.
Sum: $1,500-$3,500 per technician over 5 years. That's $300-$700 per year per person. Against a technician earning $50k-$80k annually, organized storage cutting just 30 minutes per week pays for itself. Most shops report 45-60 minute weekly gains.
10. Implementation: From Choice to Standardization
Once you've chosen your chest, the real work begins: standardizing the setup so it survives across shifts, technicians, and time.
First-Week Launch Sequence:
- Unbox and assemble together. Don't let one person solo-build it; multiple eyes catch issues and everyone gets familiar with the mechanics.
- Walk through your three most common jobs (e.g., cooler repair, fryer maintenance, dishwashing line fix). Simulate each using only what's in the chest. Note missing items or awkward reaches.
- Create a photo-based "golden setup" guide. Each drawer photographed with labels visible. Print laminated copies and tape them inside the chest.
- Run a reset drill: Close it up empty, then rebuild from a checklist in under 5 minutes. If it takes longer, simplify the layout.
- Audit weekly for one month. Quick visual scan: Are tools where they should be? Missing anything? Update the layout based on real-world use.
- Lock in the standard. After four weeks, freeze the layout and communicate it to the team: "This is our baseline. Changes require documentation and approval." Document it, then do it.
11. Scaling Across Multiple Technicians and Sites
If you manage a team or multiple service bays, multiplying one good setup is more powerful than having each tech customize their own.
Standardization Approach:
- Baseline chest: All technicians start with an identical base configuration (same zones, same tool positions, same labeling scheme).
- Specialization layers: If Tech A does more electrical work, their personal set of specialty probes or testers lives in labeled secondary storage (e.g., a Packout-style modular box). Never embedded in the main chest, so other techs are not confused.
- Chest rotation: For high-volume shops, keep one "clean" backup chest staged. When a technician needs an emergency restock or a chest develops an issue, you swap it out and rotate the primary one through maintenance. Zero downtime.
- Training protocol: Every new hire gets a 1-hour "Chest Tour and Reset" training where you walk them through zones, the reset checklist, and the audit log. New hires who respect the system stay; those who treat it as a junk drawer don't last.
A multi-bay facility running three standardized chests and a rotating backup creates a "normal day producing pro output," even when your best technician calls in sick.
12. Documentation and Continuous Improvement
The final and often-neglected step: document everything so it survives turnover and evolves with your business.
Living Documentation:
- Baseline photos and labeled diagrams (stored digitally and printed in the chest).
- Reset checklist (laminated, 1 page, timed).
- Tool-change log (dated entries: "Added 10mm hex bit - moved to Zone B, drawer 3, left side. Retired old set of Allen keys.").
- Before-and-after metrics (e.g., "Average time to first tool in hand: 3 min → 45 sec; Tools lost per month: 2-3 → 0.2; Job cycle time: 28 min → 22 min").
- Audit checklist (weekly scan: all drawers close smoothly, all labels readable, all tools present and clean).
Continuous Improvement Culture:
Every three months, review the log with your team. Ask: "What slowed us down? What tool did we reach for that wasn't there? What label faded?" Update one small thing per cycle (a drawer redistribution, a new divider, a label refresh). This is kaizen: never finished, always incrementally sharper.
Conclusion: Choose, Build, Standardize, Sustain
A food service repair tool storage system is not a luxury, it's a production tool as critical as your diagnostic meter. The right chest gives you speed, prevents lost tools, scales reliably, and lasts. The right process (clear zones, repeatable resets, visual management, and documented standards) turns that chest into a multiplier for every technician.
Your next task: Pick a base cabinet that matches your workflow (mobile vs. stationary), define your zones on paper, and spend a week testing the layout before you finalize it. Measure the before state: average search time, tools lost per month, job cycle time. After standardization, measure again. You'll see it in weeks, not months.
Document it, then do it, and watch consistency deliver the results that heroics never could on a busy Monday.
Related Articles